Sentry answers a critical question: are my users experiencing errors while using my application? You can test all day, but your users will do different things using different software, and they’ll find bugs that you won’t.
Sentry collects error log from your application and aggregates them for later resolution. And if you’re proactive, you can contact users who have problems directly!
I assume that you already have a Sentry instance set up, either paid through getsentry.com, or self-hosted (which I use).
Both the client and the server side will log to the same project. You probably want one project for your production deployment and one for any staging or development deployments. There’s no reason not to use it in development (even on your local machine) – just keep the clutter separate from your production logs!
I use ‘Other’ for the Platform, as Meteor isn’t common enough yet to have its own integration helpers. You can also use Node.js; it makes little difference.
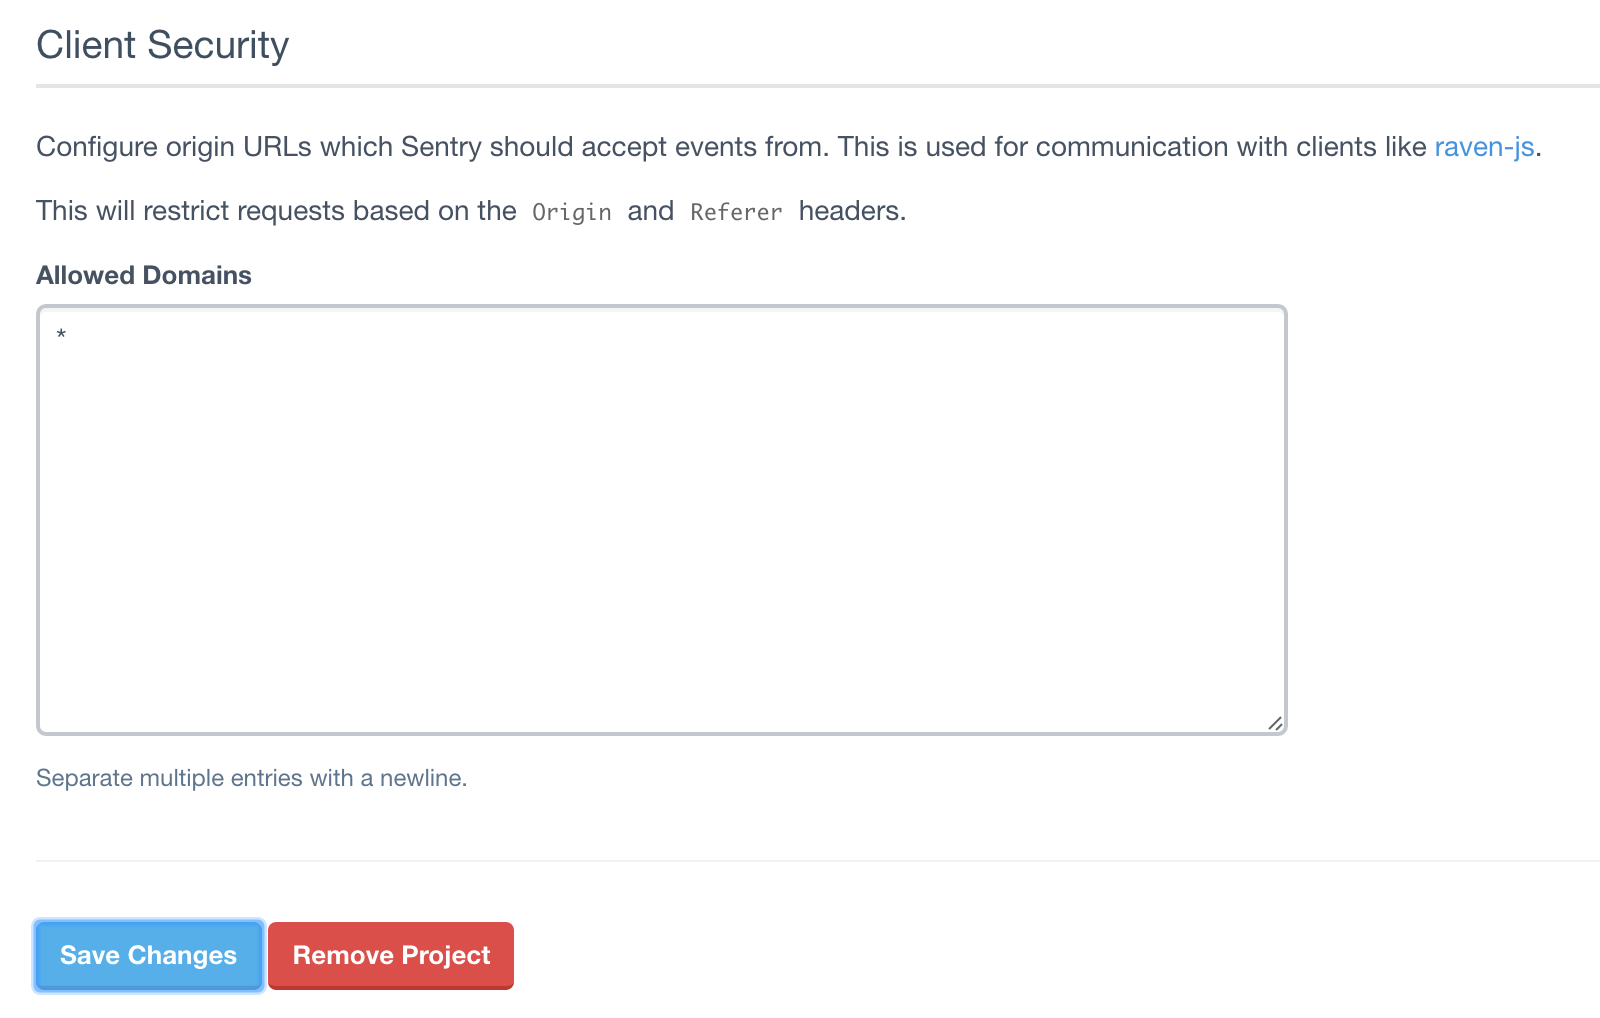
You also need to whitelist the domain that your application is running on. This is controlled from the ‘Client Security’ section of the Settings tab. The easiest thing to do is to just allow errors to be submitted from anywhere by adding ‘*’ to the whitelist:
First, add the logging plugin:
meteor add deepwell:ravenSentry uses strings called “DSNs” to identify clients that are sending it events. You need to provide these to your Meteor project.
To set up the server, create server/raven.js with the following:
RavenLogger.initialize({
    server: '<long DSN>'
});
where
Similarly, to set up the client, create client/raven.js with:
RavenLogger.initialize({
    client: '<short DSN>'
});
<short DSN> is the second (shorter) DSN value.
Why the difference between client and server DSN?
The execution environment for the client is totally untrusted (it’s random people on the Internet) so there’s no point in authenticating them strongly. Random people can and might push garbage into your logs. You just need to be aware of that when you analyse them.
Your server is (hopefully!) trustworthy, so you can trust it with a longer authentication string, which prevents random or malicious users from pushing useless log entries.
The short DSN is just like a username. The long DSN is like a username/password pair. You don’t need to give the clients the password because you don’t trust them anyway.
I strongly recommend that you use a settings.json file to store the DSN keys. This lets you easily switch between production and development configurations. This looks something like:
{
  "public" : {
    "ravenClientDSN": <shortDSN>
  },
  "private" : {
    "ravenServerDSN": <longDSN>
  }
}
Then, your server init code looks like:
RavenLogger.initialize({
    server: Meteor.settings.private.ravenServerDSN
});
and the client:
RavenLogger.initialize({
    client: Meteor.settings.public.ravenClientDSN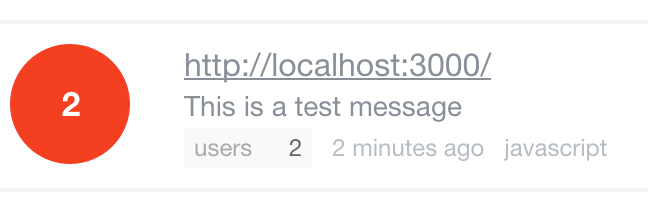
});Start your app. On the client console, run:
RavenLogger.log('This is a test message');Sentry should show your message:
Similarly, somewhere in server code (even in a new file), temporarily insert the line:
RavenLogger.log("This is a message sent from the server");Server-side exceptions should be caught and logged automatically. No extra work is required there.
On the client, exceptions are not automatically caught and logged. There’s probably an easy way to automatically wrap Meteor code, but I haven’t worked it out. Right now, you need to either:
RavenLogger.log() statements at relevant points (e.g. at assertion failures, places where you want telemetry)https://atmospherejs.com/deepwell/raven